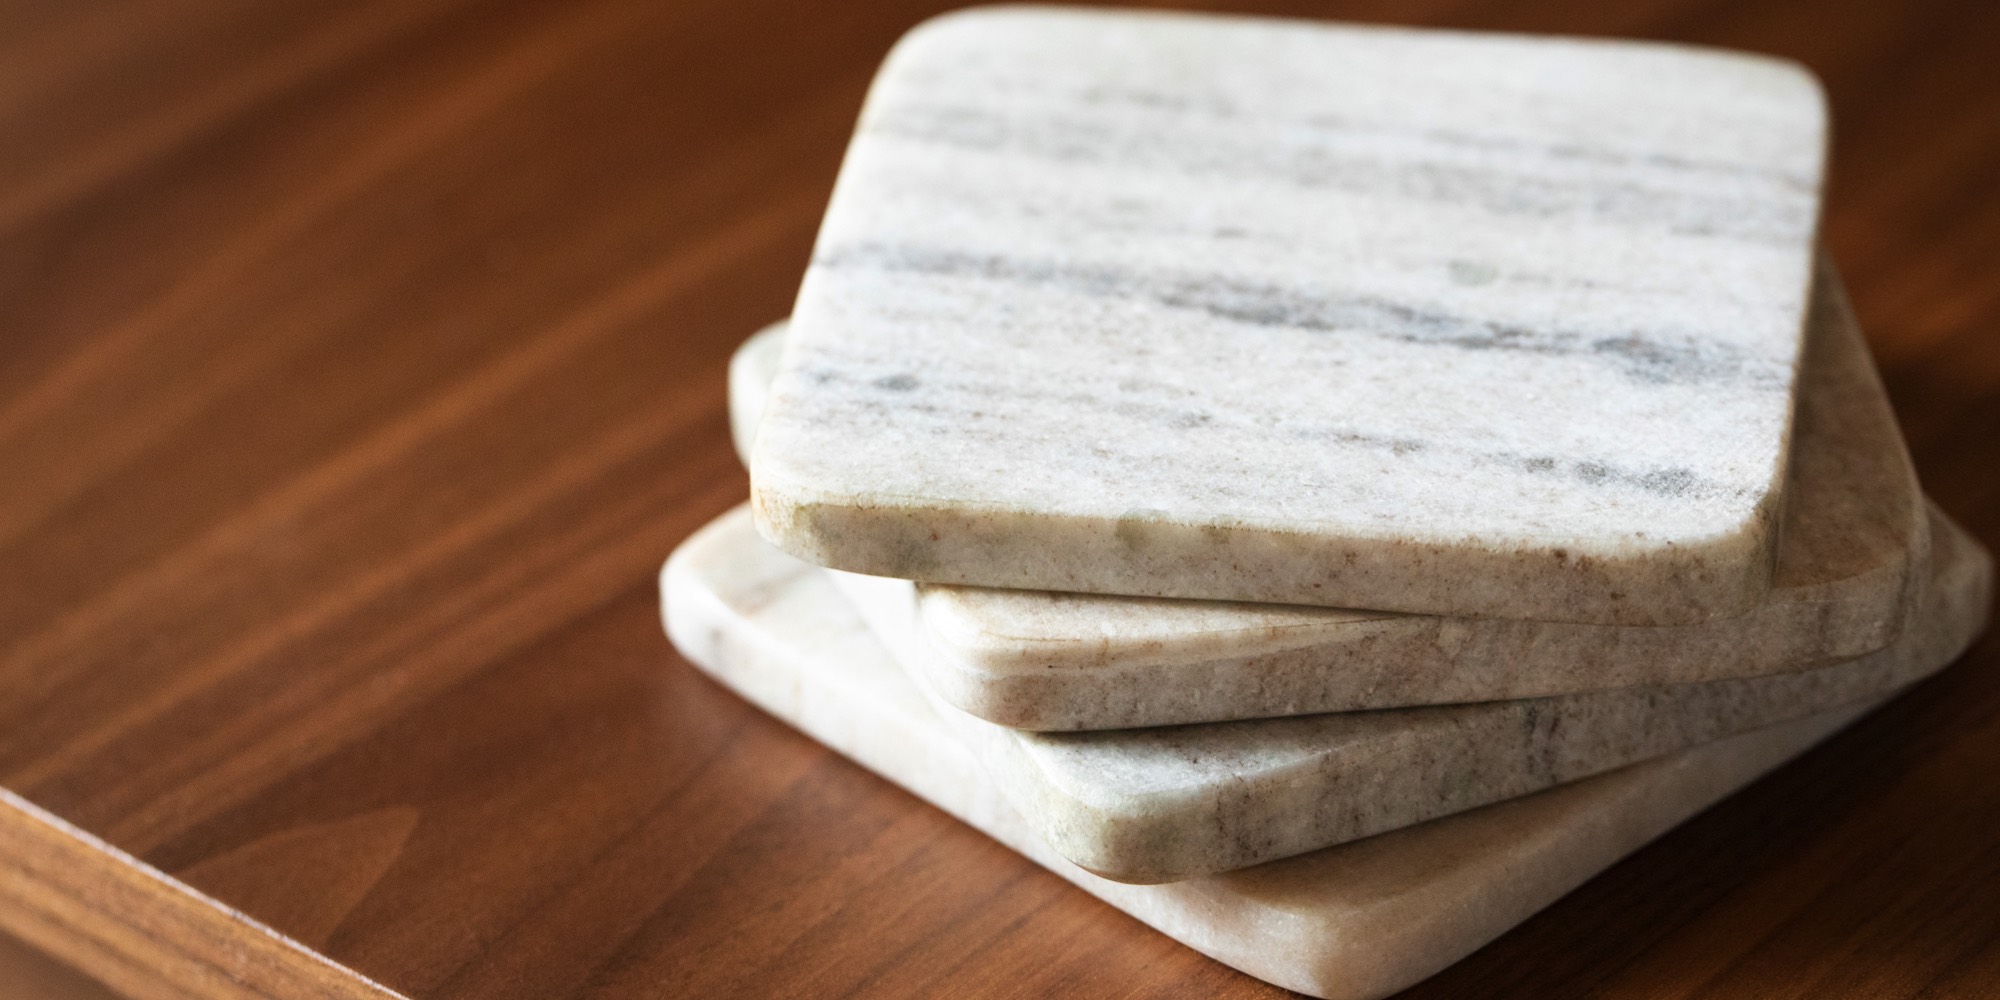
If you have a love for marble design say hey! Marble is absolutely aesthetic and elegant in design which makes it a popular choice for home interior, accessories, stationery and even clothing. Marble has an interesting history as it is being used widely in ancient Greeks building and structures which can be seen till today. In other words, marble is definitely never gonna go out of style!
If you are fascinated with marble, let us put our hands on it and get creative in creating unique marble designs. Let us marble it all!
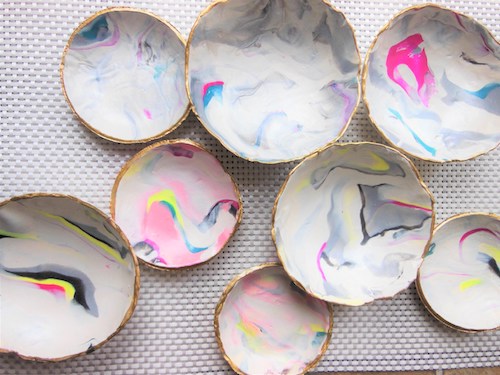
What I love about this handcraft is that it allows each piece to be unique on its own. Each piece has its own textures and marble veins that makes them a masterpiece.
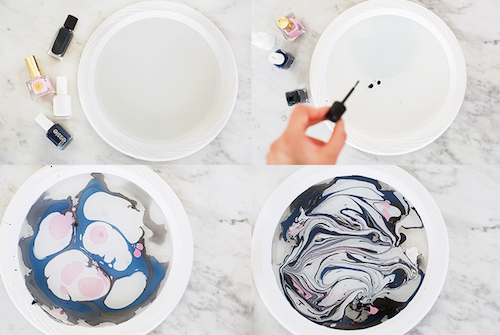
Method 1: Nail Polish
For this, the main materials you would only need:
- nail polish
- a bowl of warm water
- unused container
- a skewer or a toothpick
- a pair of rubber gloves
The steps for making the marble design is pretty much similar even for different kind of items.
1. First, fill up your container with warm water.
2. Pour the nail polish as close to the surface to produce a filmy layer. The amount of nail polish is up to your preference. The more drops you put, the more intensity the swirls will become. You can have a mixture of colours for a different effect by adding drops on random spots.
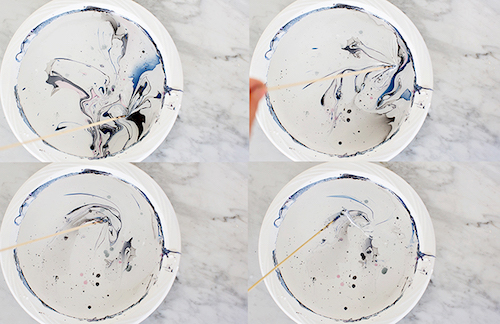
3. Use a skewer or a toothpick and swirl to mix and create the marble effect.
4. Put on your gloves. Then dip in your desired item to the water and swirl it up.
5. Leave your items to dry and voila!
Here are some tips to take note to ensure your marble swirls effect are perfect.
1. It is crucial to use warm water to prevent the nail polish from sinking into the water too quickly.
2. As you pour the nail polish, keep it close to the surface as possible to keep it on the top. Because when it sinks it will tend to form bubbles.
3. Swirling the nail polish needs to be created at a fast pace because it hardens pretty quickly.
4. As you poke into the water with a toothpick, do not poke too deep to prevent the filmy texture from sticking to the toothpick.
5. Do not double dip the items as it might ruin the original marble effect.
6. Change the water for every new dip to avoid clumps and residues.
7. Good news for this method is that if you do not like the marble effect or design, you can conveniently erase it with nail polish remover and start all over again.
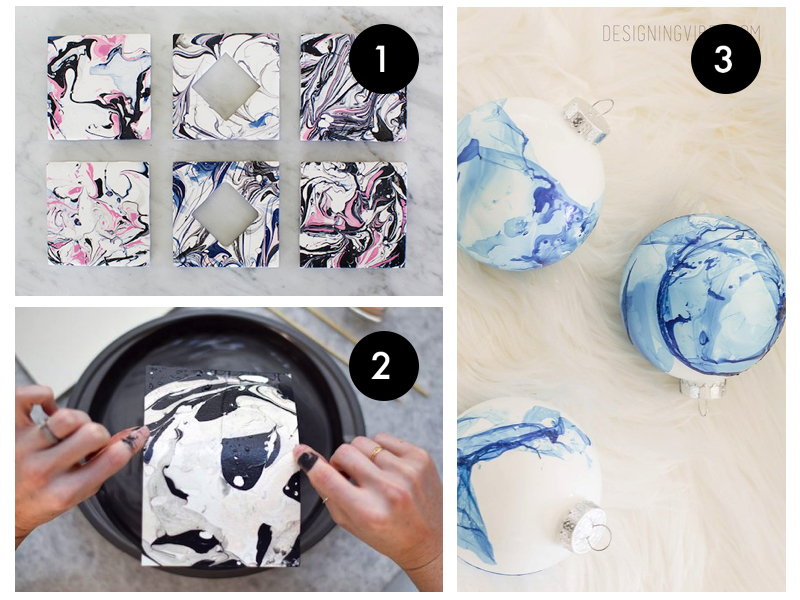
You may use this method for ornaments, papers, mugs, candles, jewelry holder and many more.
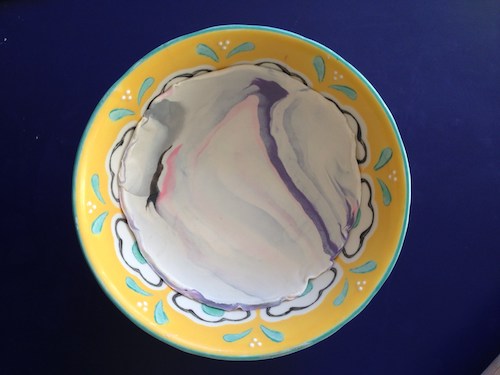
Method 2: Oven Bake Clay
Another way to achieve marble design is through using oven bake clay. This method is easy and simple as well. Helps to keep you away from the liquid stains and mess.
Materials needed:
- Oven safe bowl
- Assorted colours of oven bake clay
- cutting board
- rolling pin
- knife (plastic or butter knife)
Steps:
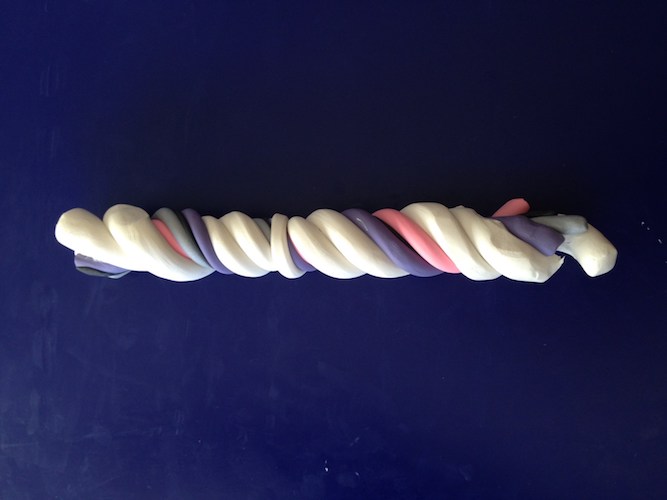
1. Roll and braid a few colours of clay together. Have more of the white clay to enable the rest of the colours to stand out better.
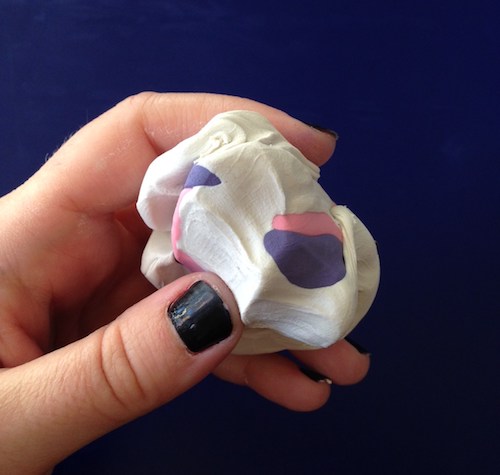
2. Clump it into a ball and roll it out with a rolling pin for about 2-3 times to form the marble effect.
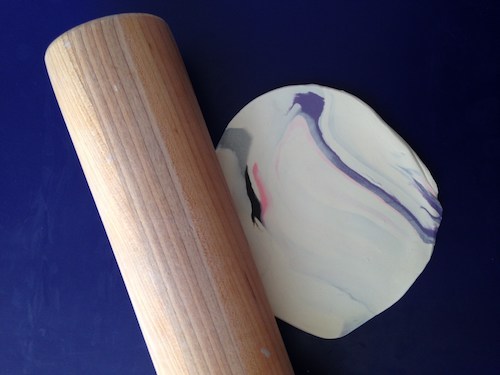
3. Roll it out flat and use a cutter to cut it into a circle shape.
4. Place the circle onto the oven safe bowl. Press it gently to the bowl to form the dish shape.
5. Bake the clay according to the package instructions.
6. Remove it from the oven. Let it cool in the bowl and gently remove it from the bowl.
7. For a perfect finishing touch, colour the rim of the dish with gold paint or a layer of gloss.
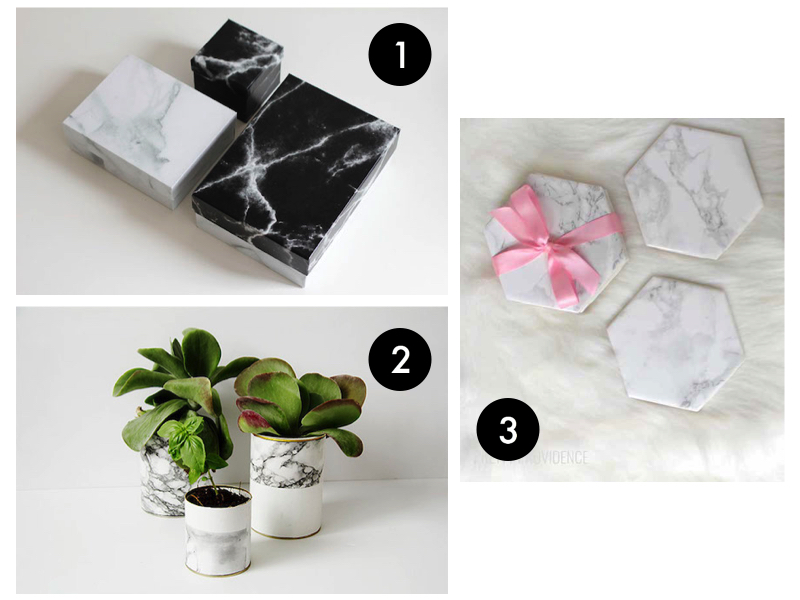
Method 3: Marble Paper
The third method to achieve marble effects and design is with marble paper. This method gives you the freedom to stick on any type of flat items for example books, gift boxes, vases in cylinder shapes too.
Materials:
- ruler
- penknife
- marble paper
- adhesive tape
Steps:
1. Measure the width, height and thickness of items accurately that you wish to stick the marble paper on.
2. Cut accordingly to the measurements.
3. Stick adhesive tape to the sides of the paper. An alternative to an adhesive tape is a strong glue.
4. Peel it off and stick on the desired items. The trick here is to pull the paper tightly to prevent air bubbles from forming.
5. If there is extra on the edges, trim the excess with a penknife or a craft knife.
Check out the ideas you can create with marble papers!
So try the best method for marbles and marble them all! They are perfect as gifts this joyous season and any home deco of yours!
 Posted by Shu Wen
Friday 9 Nov 2018
Posted by Shu Wen
Friday 9 Nov 2018