The Denim Projects You Should Try
 Posted by Shu Wen
Friday 23 Nov 2018
Posted by Shu Wen
Friday 23 Nov 2018
Share
If there is one thing that will last forever, that one thing would be DENIM! It would be hard to disagree that denim is such a wonder and it just will never go out of style, in other words, a timeless piece. In fashion, denim will never fail to make its appearance on the runway. The trend tends to get stronger each fashion week but the denim remains.
To keep the denim going strong, why not make use of it for some DIY projects too? What is great about denim is that the fabric offers durability and desirable comfort. When comes to DIY, you will discover how awesome denim is as different parts of the jeans from the pockets to the leg pants, you can transform them into unique products and items. Each part of it will never come to waste.
So if you have a pile of old jeans in your closet and felt that it is a waste to throw them or give it away, grab this opportunity to upcycle it and earn some cash from it. Feel free to collect various types of washes to make a variety of cool denim items.
On a side note, if you are planning to produce denim items, start collecting old unwanted jeans. You may start from friends or set up a booth in college and place a bucket for collecting old denim. And reward the givers with vouchers or something creative.
Continue reading and get inspired with denimspirations!
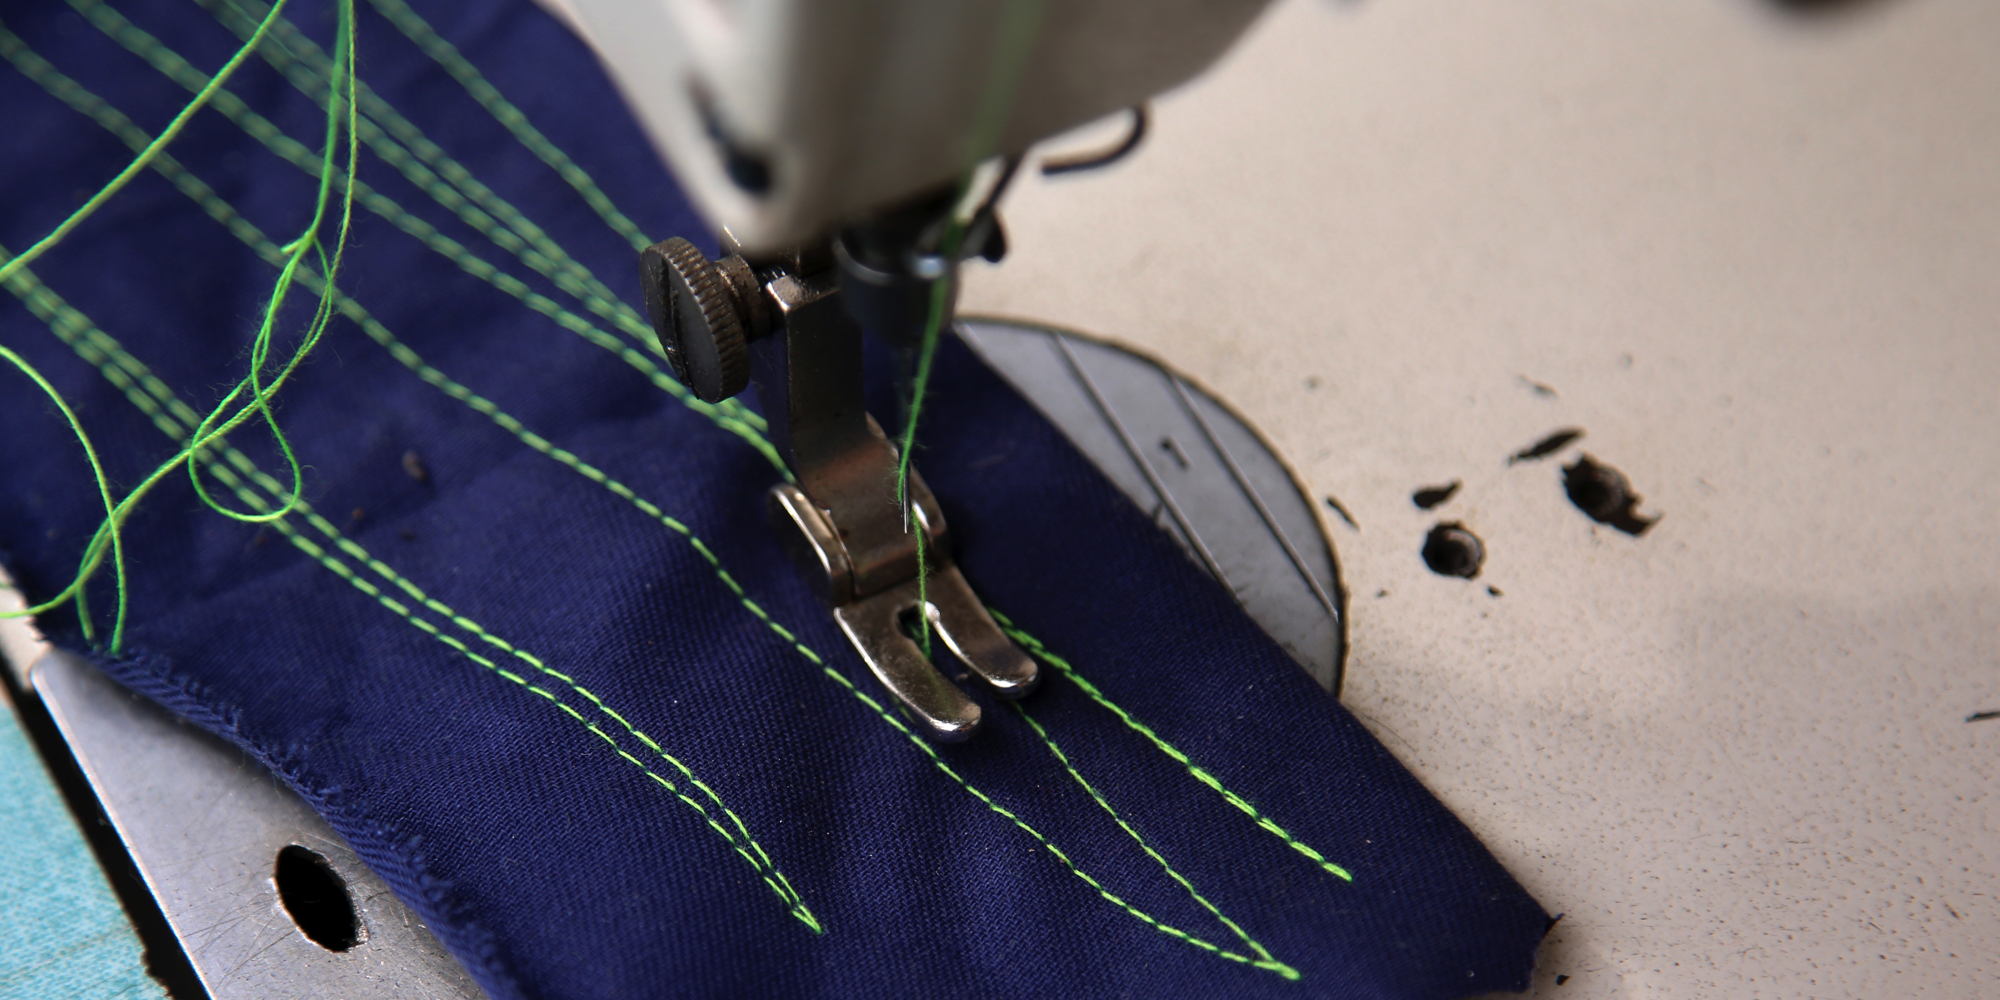
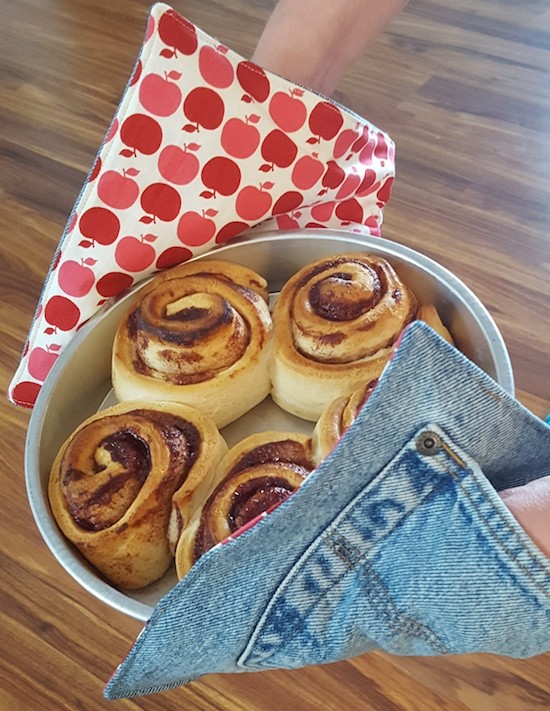
1. Denim Hot Pads/ Pot Holder
Source: We All Sew
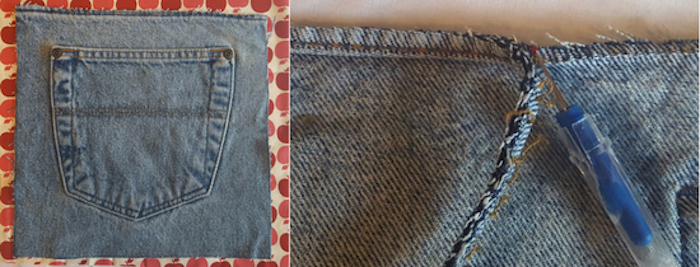
Since denim is a thick fabric, it would great to be used as an insulator, a pot holder or hot pads in the kitchen. For this, we would need the back pocket of the jeans. For adults, it is best to use men's jeans to fit adults hand better. While for the smaller hands, you can use the children's size jeans.
Materials you need:
- a pair of used jeans
- Insul-Bright (an insulator material)
- fabric for hot pad lining
- water soluble marker
- ruler
- scissors
- thread (colour matching)
- point turner or chopstick (optional)
- seam ripper (to reduce bulk; optional)
- sewing machine
Steps:
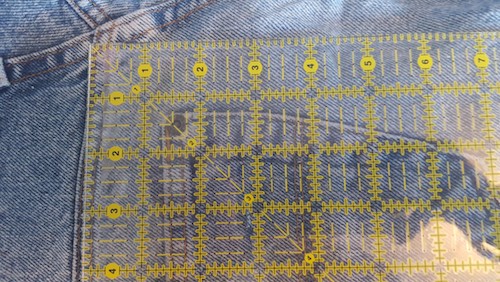
1. Firstly, measure the back pocket and mark it with a water soluble marker and ruler. Measure a 1 1/4" away from the furthest edge of the pocket and draw a square. Then, cut according to the marked lines.
2. Once you cut the pocket out, remove the excess bulk like the seams with a seam ripper. This would make sewing easier and stay neat.
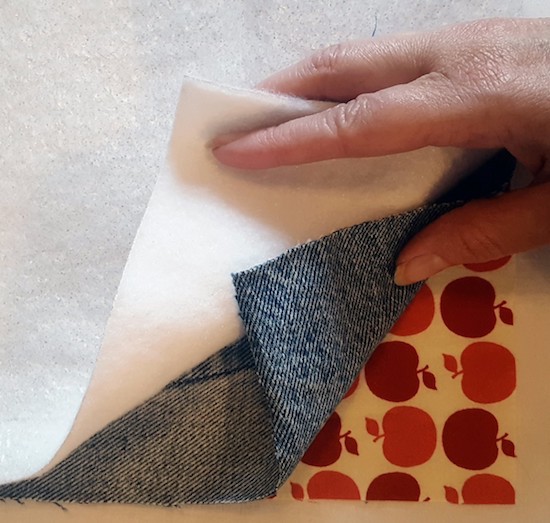
3. Cut out the lining and Insul-Bright fabric using the denim square as template.
4. Arrange the lining fabric and denim pocket facing each other with the right side. Then, place the Insul-Bright on top of the denim. Pin the fabric together and it is ready to be sewn.
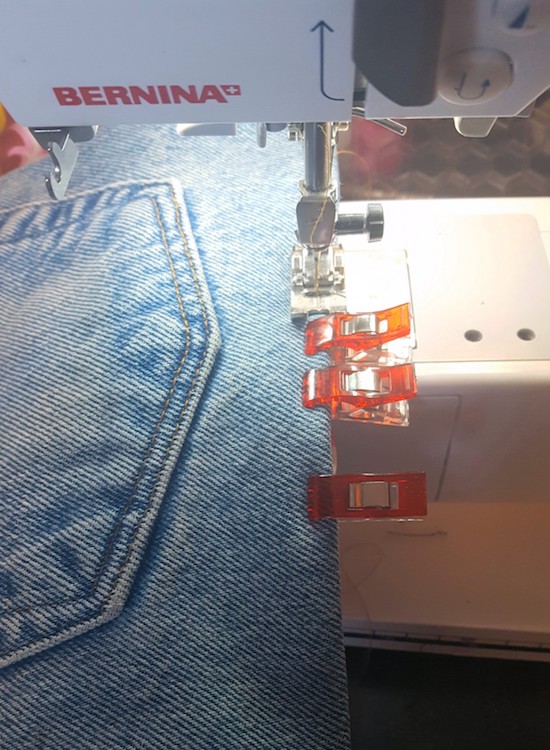
5. Using your sewing machine, sew around the edges.
6. Then cut the corners with scissors. Turn the fabric around and press firmly with an iron.
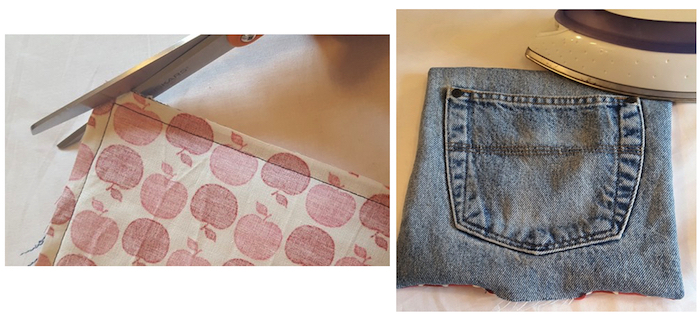
7. Give a final sew on the edges and be ready to catch the opening of your stitches and close it.
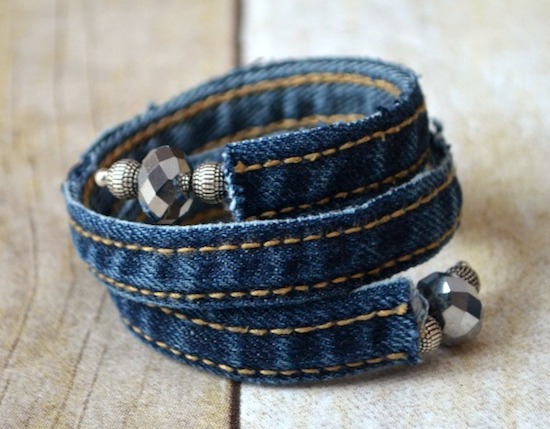
2. Denim Bracelet
Denim bracelet hmm, how cool is that? Be the trendsetter in wearing denim accessories. This denim bracelet is simply an easy craft to do. Just require a little patience in wiring it through the tiny space between the seam! Check out the steps below.
Source: Amy Latta Creations
Materials you need:
- a pair of old jeans
- scissors
- memory wire
- wire cutters
- assorted beads
- super glue
- 3 mm end caps
Steps:
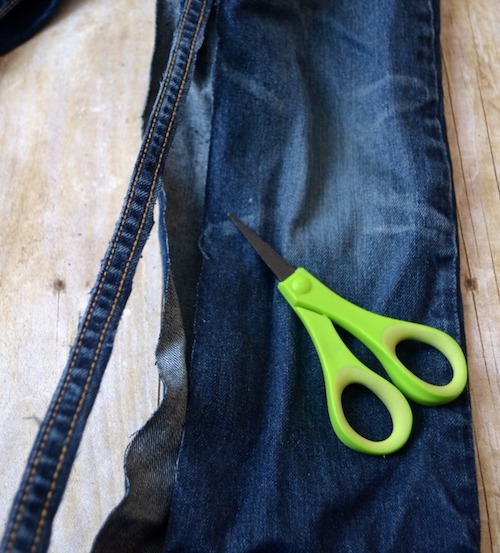
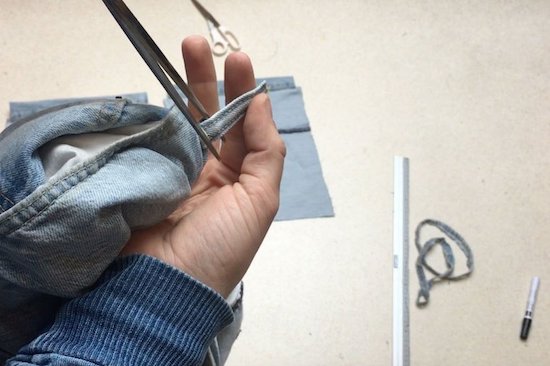
1. Prepare a pair of old jeans. Cut a long strip of seam on one of the leg pants. Cut it to the length that is long enough to wrap around the wrist twice.
2. In between the seams, there should be a little space where you can insert the wire in it.
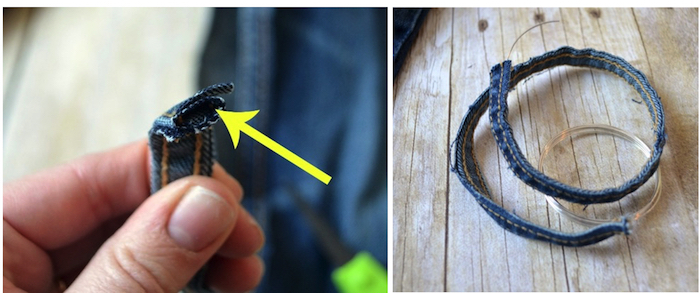
3. Once you have successfully inserted the wire into the denim strip, leave the 1.5" of the wire and trim it. With the excess of the wire, thread on your preference of beads. You can have fun in this area and personalise it with different colours, shapes and sizes of beads.
4. To finish off the look, at the end of the memory wire, glue an end cap on both sides to keep the beads from sliding off. Another alternative to using an end cap, you can form wire loops on each end. However, this would be more challenging as the memory wire is hard to be shaped into the loops.
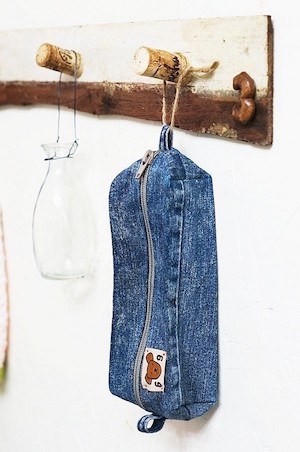
3. Denim Pencil Case
Here is a pencil box with denim style. There are different types of shape that you can try with. From flat ones to bulky ones like this. For this, I think this is great for beginners to start with. Relatively easy and the size is practical for filling in more pens and pencils, perfect for stationery lovers.
Source: Handmadiya
Materials you need:
- a pair of jeans
- scissors
- zip
- sewing machine
Steps:
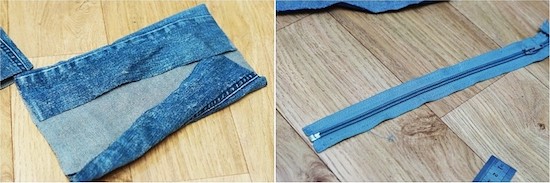
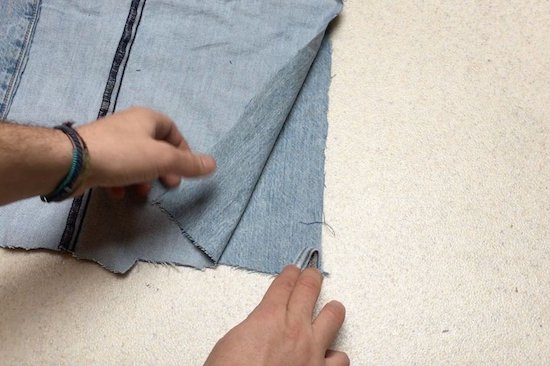
1. Cut one of the leg pants of the jeans. It would be better to have the straight cut of leg pants with the same width.

2. Lay it flat and cut through a centre line. Then unzip the zip and sew it along the edges.
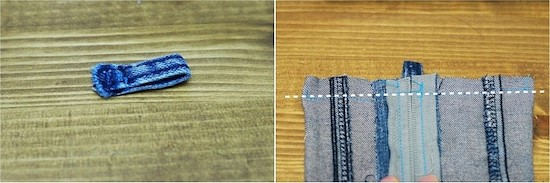
3. Once you have sewn the zip, zip it up and flip the fabric to the inner part.
4. Prepare a belt loop and place it right at the centre in between the zip track. Then, sew straight across with a sewing machine.
5. After that, puff the sides up and form the pointed sides. Sew vertically down on both sides.
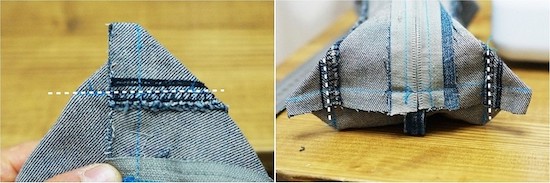
6. Unzip it and overturn the pencil case.

7. You may iron the top and each sides of it to form a more rectangular shape. And feel free to decorate the pencil box with sequins, tags, your personal brands and others.
4. Denim Wall Storage
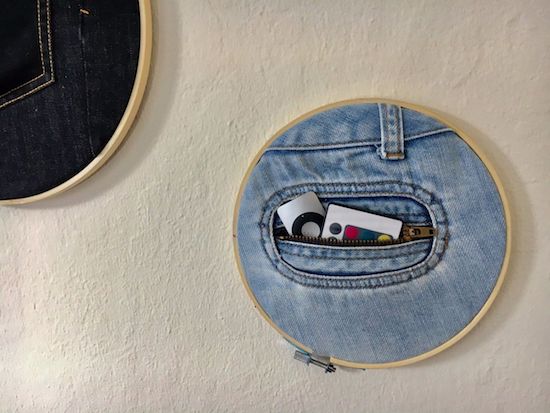
Source: Hometalk
This denim wall storage is actually a pretty cool idea to incorporate into homes. They are unique as decor as well as practical for additional storage, especially for organising small and tiny items.
Materials you need:
- a pair of jeans
- embroidery hoop
- scissors
- marker pen
Steps:
1. Firstly, prepare a pair of jeans. You will need the back pocket part of the jeans.
2. Cut the jeans into half. Turn the jeans with the inner facing upwards. Measure by placing the hoop on the jeans and make sure the pocket is within the hoop.
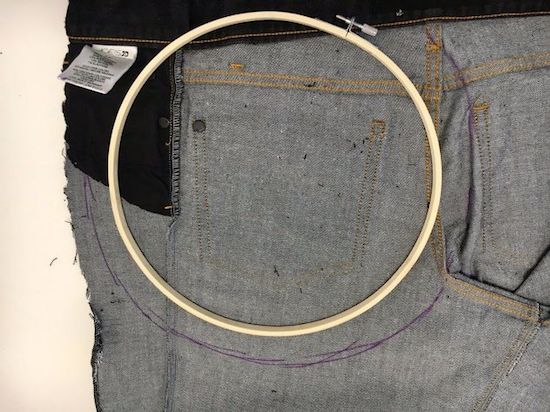
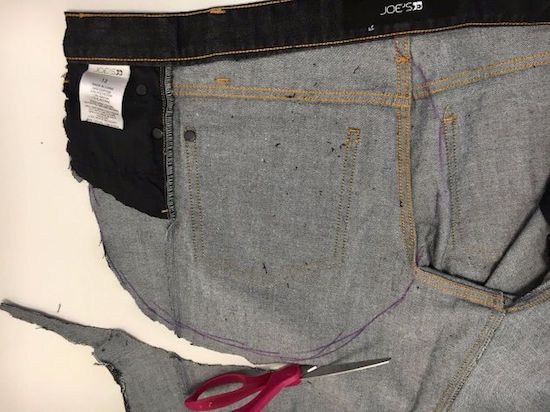
3. Mark it with a marker pen around the hoop. Draw about one inch circle bigger than the hoop.
4. Then the circle out with scissors.
5. Loosen the screw of the embroidery hoop. There is an inner circle in the hoop. Place the inner circle underneath the denim cut out. While the large circle is on the top. Unscrew it until the inner hoop fits in the outer hoop.
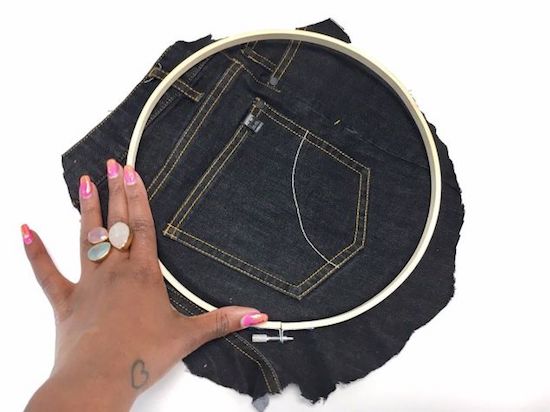
6. Once it is in place, tighten the screw. Ensure that the jeans is pulled tightly.
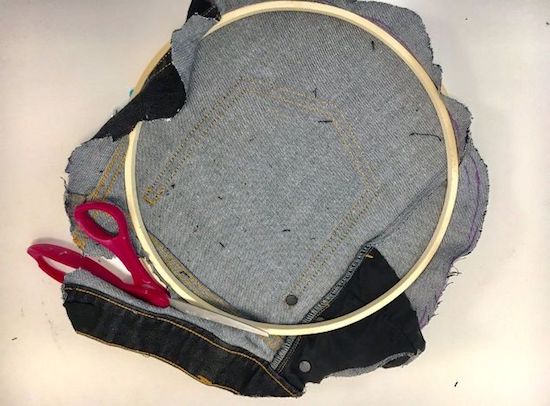
7. Lastly, cut the excess material and it is ready to be hung on the wall for display and storage!
For extra creativity, use different types of jeans pocket from zip ones to normal pockets.
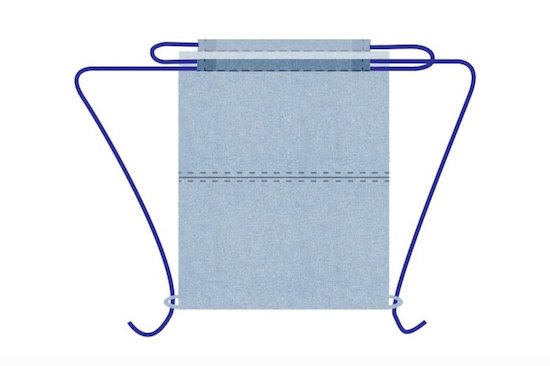
5. Denim Drawstring Bags
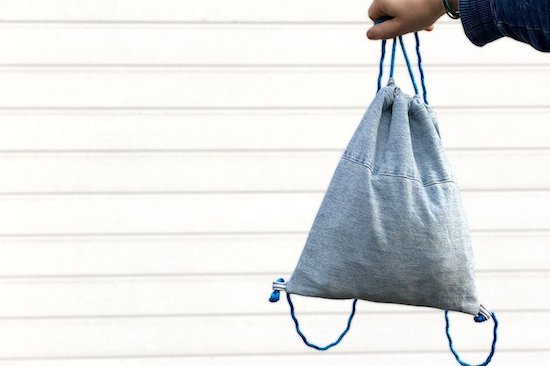
Source: Instructables
For drawstring bag lovers, here is a practical denim project for you. This is quite a simple and straight forward bag to try and sell them as it appeals to many students as well as teenagers.
Materials you need:
- jeans
- string
- scissors
- sewing machine
- marker
- ruler
Steps:
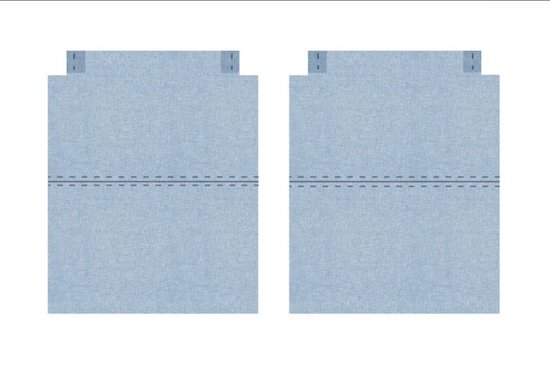
1. Turn your jeans inside out. Place the jeans flat with the two leg jeans close together.
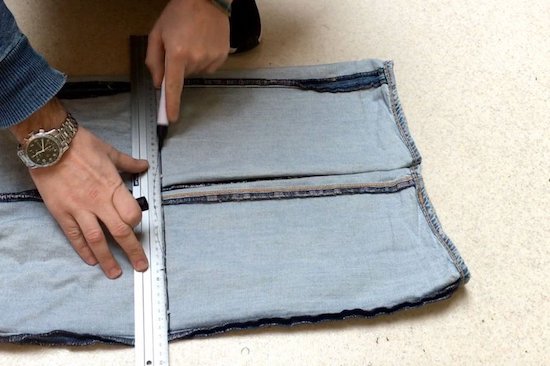
2. Measure the width of the bag. For this tutorial, the measurement is 35cm. You can have it bigger or smaller. Then, cut the two pieces with scissors.
3. Then cut the seams which will give you two pieces of denim.
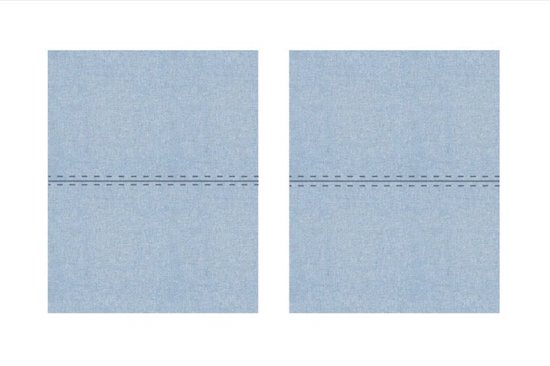
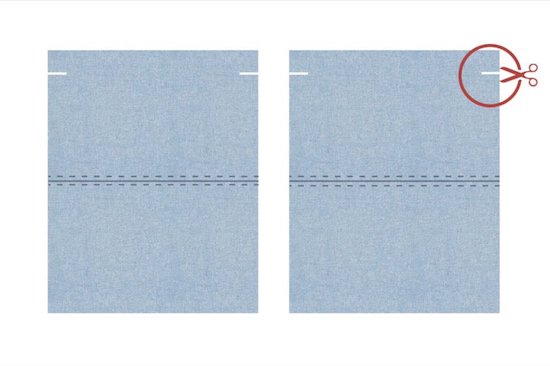
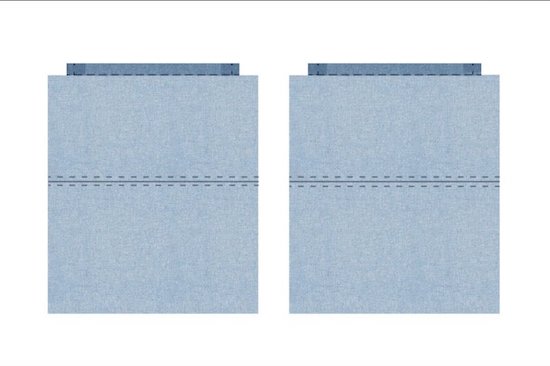
4. To create tunnel for the string, cut about two cm on both left and right side on the top.
5. Fold it in and sew the sides.
6. After that, fold the top and sew it straight across to close the tunnel.
7. Cut two belt loops from your jeans. They are used to secure the string at the bottom sides of the bag.
8. Place the loop on each side of the bag. Then, sew it to close it.
9. The final part of it is to attach the string into the tunnel according to the image shown. Pull it till you get your desired length. Then tie it over the loop and end it with a knot.
For clearer steps, there is a video tutorial for you.