Embroidery Pattern Guide for Beginners
 Posted by Shu Wen
Friday 8 Feb 2019
Posted by Shu Wen
Friday 8 Feb 2019
Share
Embroidery is a handicraft in which needles and thread are used to create beautiful designs on certain fabrics or other material. It is a beautiful activity to learn which gives you an opportunity to design your own clothes. But this can only be done if you know how to stitch. Stitching is an art that you have to practice on and on in order to become better. Learning to embroider is not as typical as you might think if you practice the right techniques. You do not need a lot of resources, just some basic stitching skills and you are good to go. If you are new to the field of embroidering here is an embroidery pattern guide which will teach you some of the simplest patterns of embroidery quickly.
Types of Embroidery Pattern
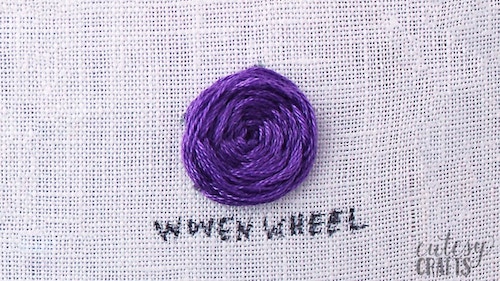
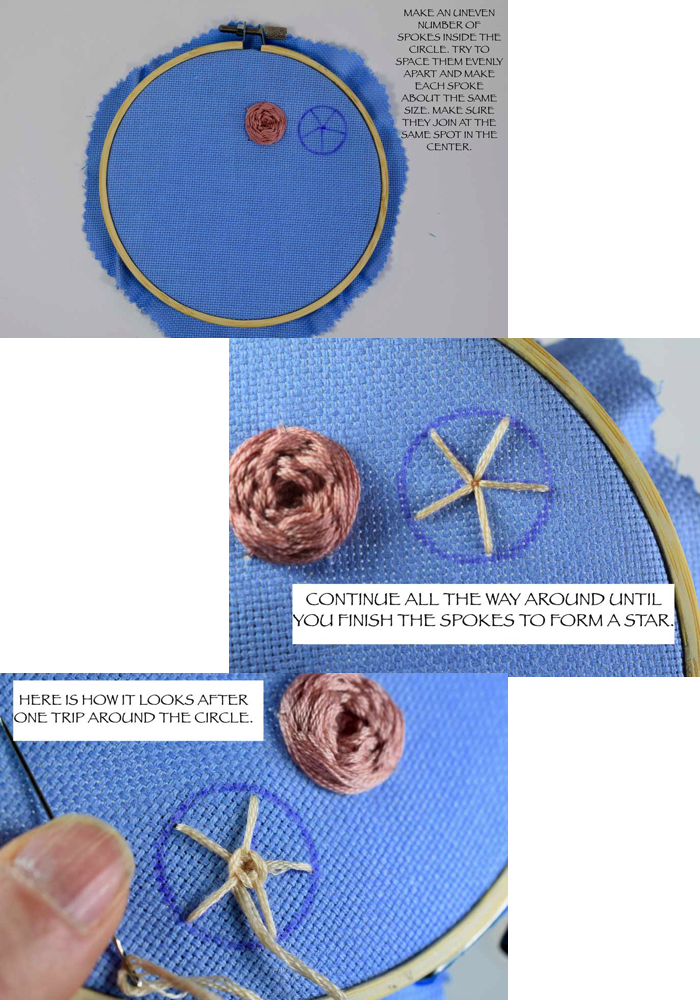
Woven wheel stitch
Woven Wheel Stitch is an easy embroidery pattern to learn for the beginners. This embroidery pattern is also known as oven rose stitch as the overall pattern is in shape of a rose or wheel. Begin with the woven wheel stitch by making a 5-point flower or a star. Make sure all these points are of the same length and are equally spaced. You may draw an outline of the points using a pencil before beginning the stitching in order to avoid any mistakes. Once done, Start weaving the embroidery floss over and under every point created. Go over and under alternating the points until you completely fill the spaces forming a wheel or a rose. If you are making a bigger rose, add more points.
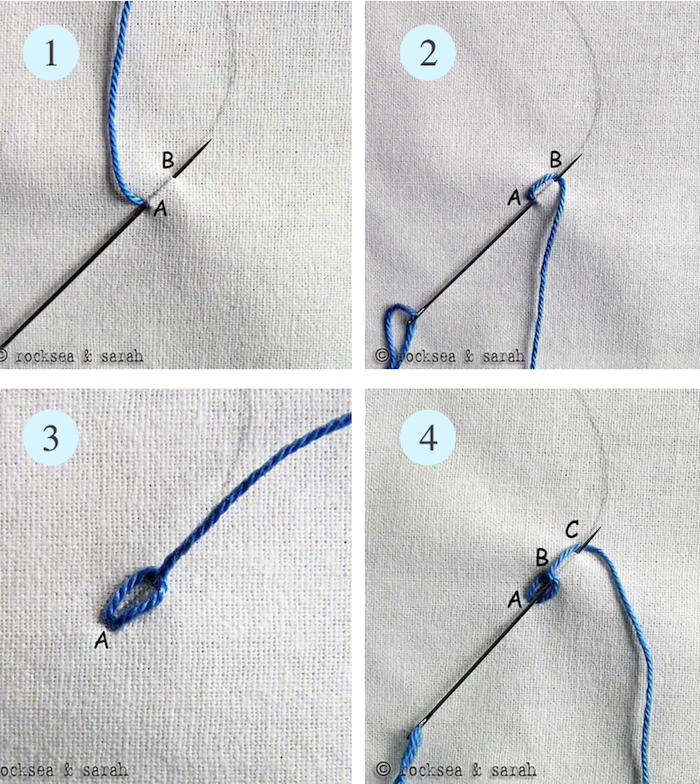
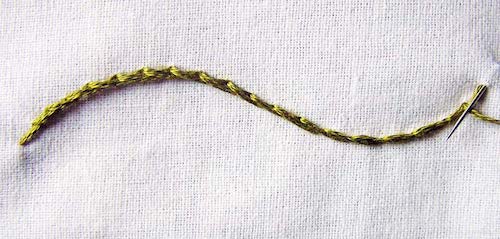
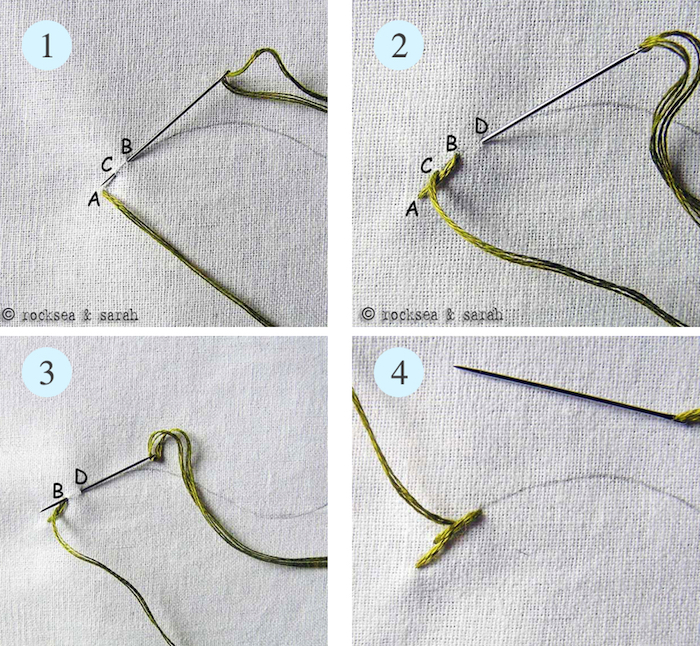
Chain stitch pattern
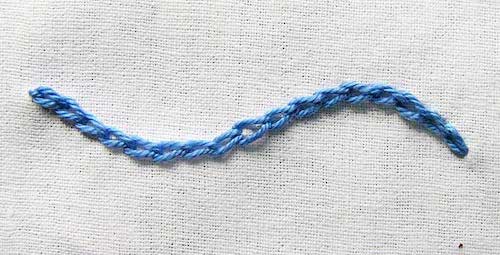
Chain stitch is an embroidery pattern in which loops are stitched to form a chain-like pattern. It forms a line of interlocking hoops. Chain stitch can be used as filling and as decorative stitch by lacing it with other threads. Begin by putting the needle in the fabric and then again taking it back from the starting point. Put the yarn behind the needle and pull the needle through the loop. Keep repeating this process for more and more stitches. Once done finish it with a straight stitch at the end.
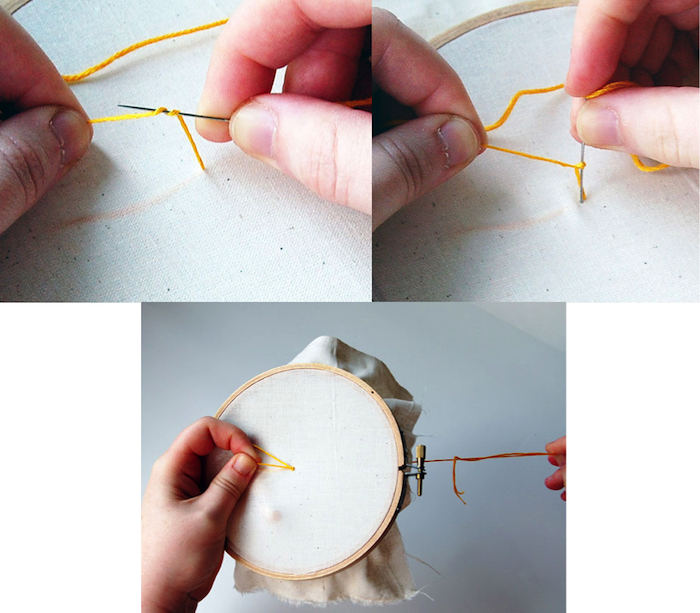
French Knots
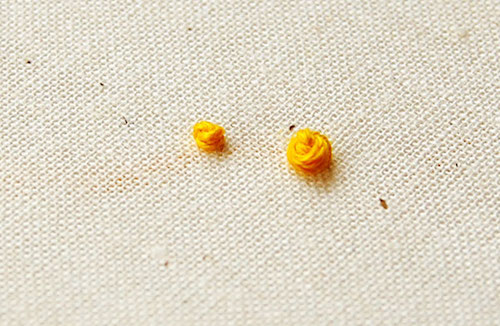
A French knot is one stitch that every embroider should learn. Start by bringing the working thread up to the front of the fabric holding onto it by your non-stitching hand. Place your needle against the working thread and then wrap your thread around the needle twice. Take the tip back down next to the where it came out but in a different whole and then holding on to the working thread supplying a little bit of tension pull your needle through the knot. As you get close to the end, let go of the thread. Keep the working thread under strain until the last moment when it passes to the back of the fabric.
Stem stitch
The steam stitch got its name from being the common stitch used for the stems of flowers or vines. It is a terrific outlining stitch and it makes a beautiful rope line lines. It also takes tight curves very well so it is excellent for detailed work. It is such a versatile stitch that you can even use it for filling.
Start by inserting your needle UP from the back, at the start of your design. Send your needle down one stitch length from the start of your design and repeat this. Make your stitches longer for a finer steam stitch.
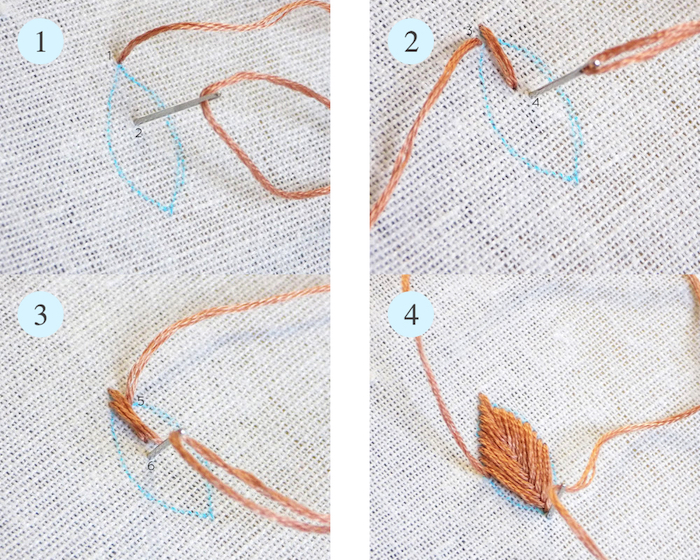
Fishbone stitch
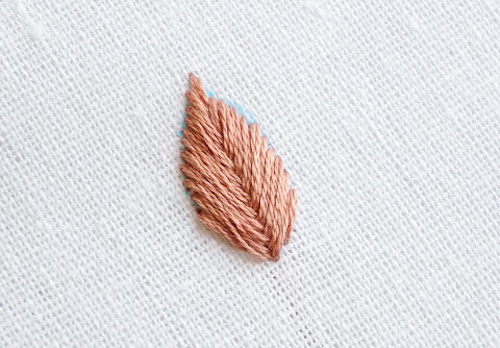
Fishbone stitch is great for creating leaves and petal shapes using a series of overlapping straight stitches. Make the center with a pencil to make things easier and later rub the outlining done. Fishbone Stitch starts by making a small vertical stitch at top of the area to be filled. Then bring needle upon the left, making a slanting stitch towards the Centre, inserting needle just below first straight stitch and a thread or two to the right of Centre. Bring needle out on the right. Make a slanting stitch towards the Centre. Stitches must cross the Centre.
Needle painting
As the name suggests this embroidery pattern involves sewing with a needle. This embroidery pattern gives a real painting look in form of strokes of the brush to your embroidery. Needle Painting is Basically the replica of a picture, painting or photo but with a needle and thread. This pattern requires only basic hand embroidery skills and the pattern only uses long and short stitches. For this pattern, you will be required to take many embroidery needles and every needle must be used with a single strand of thread for the fine shading and overall effect. In Needle painting, you need to make a lot of stitches in a less place. Hence cotton or linen fabric are perfect options for needle painting.
Tools and supplies needed for embroidery
Here is a list of the most essential tools and supplies that are most needed when you are going for embroidery.
* Plenty of thread. Preferably silk threads for woven wheel stitch.
* Needles for weaving. Milliner Needle for chain stitching.
* Embroider Hoops or fabric.
* Embroidery Scissors
* Water-soluble pens
* Cardboards
* Rulers
Tips of Do's and Donts
1. In woven wheel stitch, the more the strands in the needle, the fuller your design will seem. Do not try to be perfect while weaving inside the wheel - the thread not sitting perfectly will give a 3D effect to the whole design.
2. Take care when working around other stitches to not hitch them.
3. In chain stitch, make the chain broader by inserting the needle a little near the hole the last thread came from. Take caution to not draw the floss too strongly at any point, as this can cause the material to "wrinkle" or pull up, especially when operating on curved lines. The thread tension should neither be too losing or too strong.
4. When pulling the needle under the stitches the neighbouring stitches can be harmed. So be careful with that!
5. For French Knots, use a milliner needle rather than the regular embroidery needles as a miller needle It has an eye that's the same thickness as the shaft, making it easier to go through heavy knots. Also, don't wrap the thread around the needle more than three times.
6. When going for stem stitch do not make your stitches too long when heading around a tighter curve as it will cause the steam stitch to look hairy and messy.
7. Do not increase the distance between your stitches while doing fishbone stitch embroidery and do not go far from the centre line when you make diagonal stitches.
8. In needle, painting do not put more than one strand of thread in the needle or you will miss on the realistic painting looking effect of the whole pattern.
Get your creative caps on and Use these patterns to make new designs and embroidery. Embroidering can be a great habit, once you begin with it you start to like it more and more. Do not be sad if your first attempt in making these embroidery designs does not succeed, just keep practising and sooner or later you will learn how to it rightly. Always remember practice is the key to good embroidery!