Discover Trash to Treasure With These DIY Tricks
 Posted by Shu Wen
Saturday 17 Nov 2018
Posted by Shu Wen
Saturday 17 Nov 2018
Share
Plastic is definitely not alien to our daily lives. From grocery shopping to food containers and wrappers, all we use are plastics. True enough that plastics are wonders. However, with plastic being a non-biodegradable item, more and more plastics are being produced each year, they actually bring harm to the environment and to the sea. It is easy to produce yet difficult to be absorbed back into the environment. According to BBC News, 8,300 million tonnes of virgin plastics have been produced each year and 50% of them are usually single-use products and being thrown away after use.
It is definitely good to hear that society is taking part and making effort in reducing the consumption of plastics through the use of recyclable bags, eliminating the use of straws and using reusable containers. These are extremely great efforts ,however the rate of using plastics is still far greater compared to the effort of reducing it. Since it takes such a long time to decompose and degrade, why not let us upcycle plastics instead!
What's upcycling?
Upcycling, in other words, is creative reuse, transforming unwanted waste or old products into something of higher value and beautiful.
So here we are, let us make use of these plastics we have and turn them into something we can treasure with simple DIY tricks. Let us have fun with turning trash into treasure!
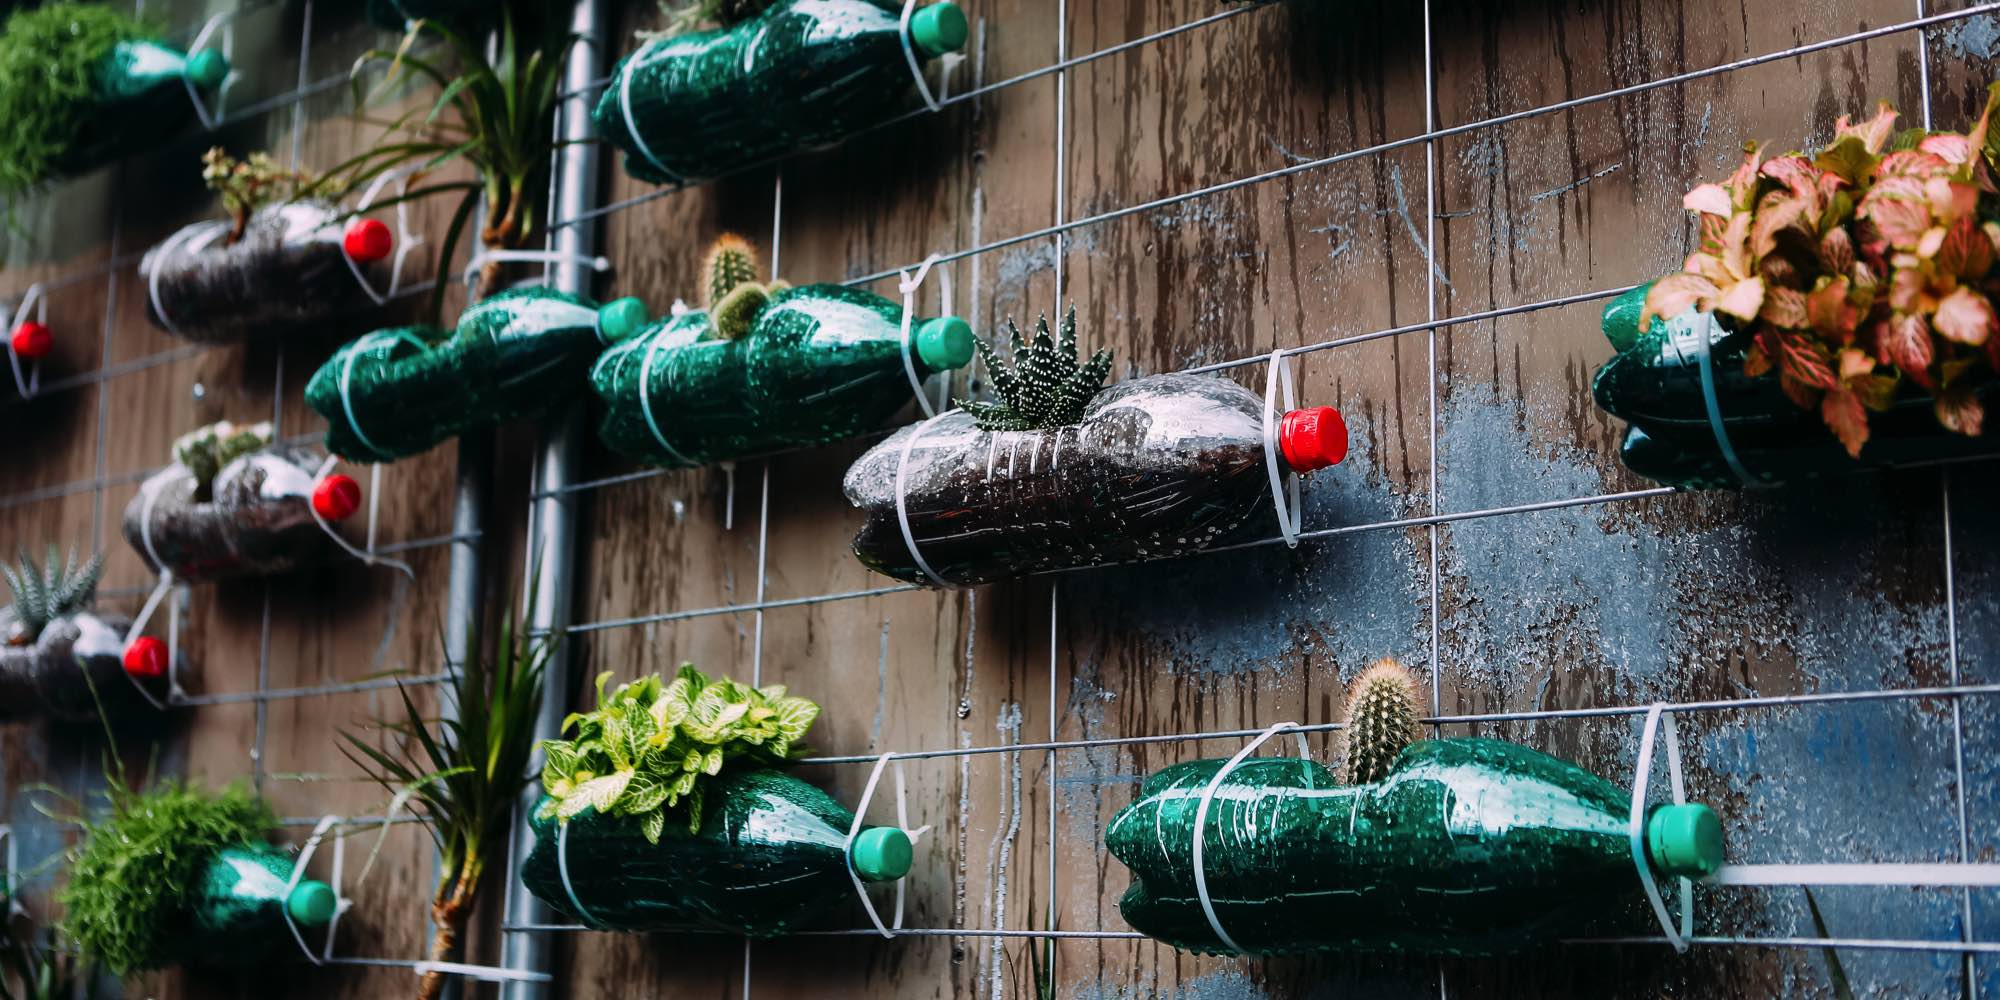
1. Cute Planters
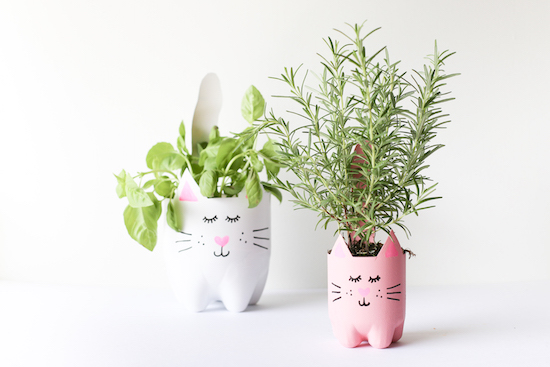
Source: Salty Canary
The most common way is to upcycle plastic into cute planters and pots. If you love plants and wish to add a touch of nature to your home or space, start saving up some plastic soda bottles that you usually drink and start making them.
Here is for cat lovers. They are extremely easy to make. If you are not into cats, feel free to have it in whichever animal you like.
Materials you need:
- Soda bottles - small or medium size
- spray paint
- scissors and pen knife
- paint pens
- gravel
- plants of your preference
- Drill (optional)
Steps:
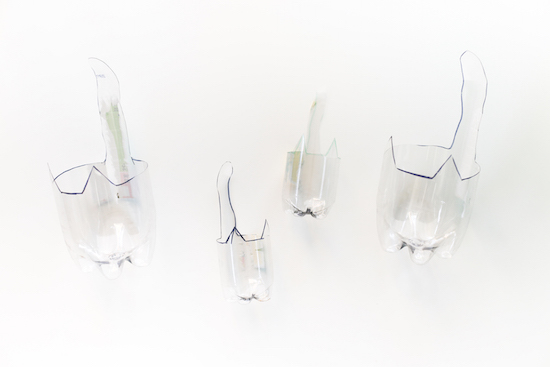
1. First, you would need to collect soda bottles. You may have different sizes from small to big bottle sizes. Then, remove the labels from the bottles. If the stickers on the bottle leaves an adhesive stain, try using alcohol or nail polish remover to remove the residue.
2. Next, sketch and draw your cat outline on the bottle using a marker pen.
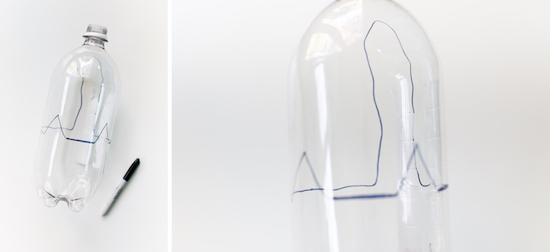
3. Move on to cutting the cat according to the outline. Be careful when using the knife to cut through the bottle. Cut a few inches and then use the scissors to cut the remaining. It is fine if the lines are not perfect, you can always perfect them after cutting them out.
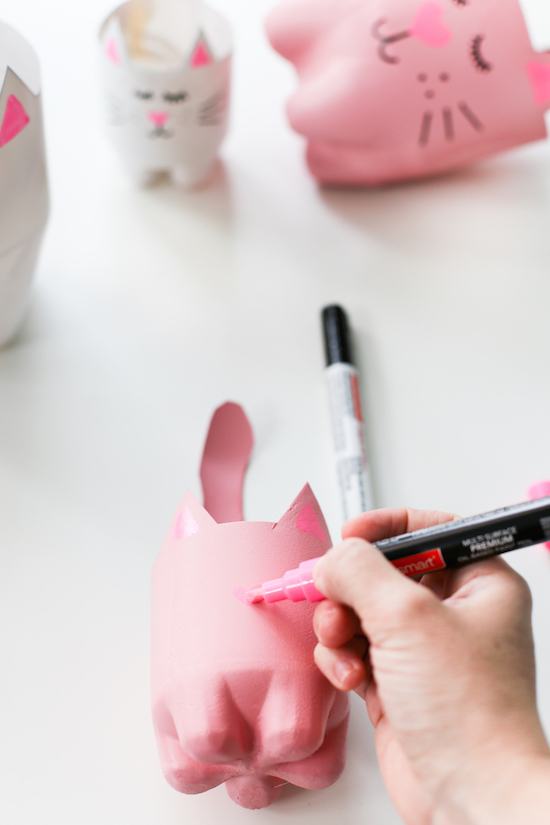
4. Lay a layer of paper or plastic on a flat surface for spraying. Then, paint the bottles with spray paint. Start with spraying the back first just in case if anything sticks on it as you roll it over to the front. Let it dry. You will need at least two coating of paint to cover the marker pen outline.
5. Once it is dry, you can start drawing the face, nose and whiskers using the paint pen.
6. This step is optional. You may drill a hole at the bottom for drainage.
7. Then, pour in some gravel as the base. Transfer your plant or whichever plant you wish to have into the cute planters. Then place them at a place with adequate sunlight.

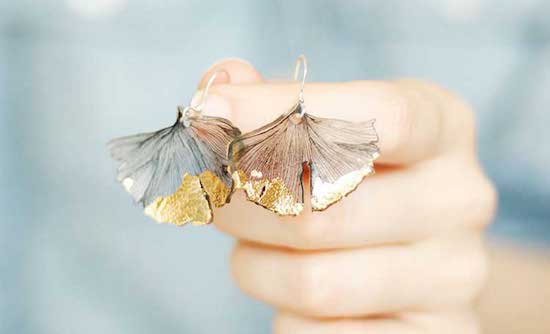
2. Gingko Leaf Earrings
Source: Well Nesting
Wait what? Earrings? Yes you got it absolutely right! Who ever knew that plastic could turn into something beautiful and be worn daily right? Who would even know they are made from the plastics! You think the end product is awesome, wait till you make them yourselves, the process is even more awesome!
For this, you'll need shrink plastic. Shrink plastic is a versatile material where it shrinks from its original size when heated.
Materials you need:
- Shrink plastic
- fine tip marker pen (permanent)
- scissors
- hole puncher
- earring wires
- pliers
- parchment or aluminium foil
- baking tray
- gold leaf kit
- paint brush
Steps:
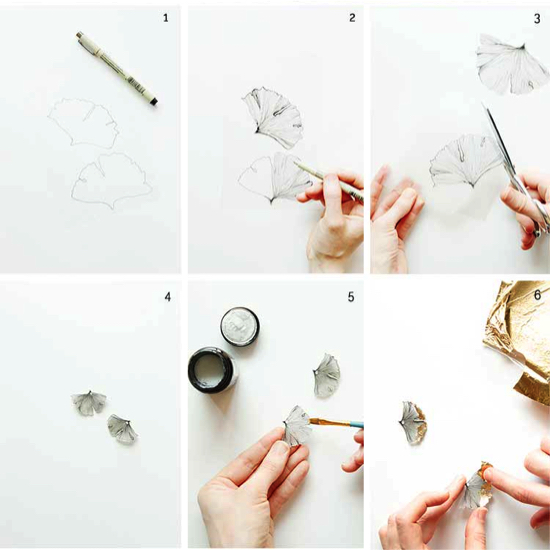
1. First, preheat the oven to 350 degrees. Line the parchment paper or aluminium foil on the baking tray.
2. Grab your fine tip permanent marker and start sketching the outline of your leaf. Make sure you draw at least 3 times bigger than the size you wanted.
3. Then add some details to it by drawing fine lines of veins. Draw the veins outwards starting from the centre to the edges.
4. Cut out the leaves using scissors. And punch a hole using the normal size puncher.
5. Place it on the tray and bake it for about 2 minutes or until the plastic has melted completely.
6. Remove from the oven. While the leaves are still warm, gently curve in and out the edges to get the ruffle effect.
7. Once the leave has cooled down, paint sizing the bottom edge using a paintbrush to seal the surface and make it less absorbent. Then let it dry for about 1 minute.
8. Add a touch of glam with gold leaf to each earring. Use fingers to gently smooth it and let it dry for at least 30 minutes.
9. Lastly, finish it off by hooking the ear wires into the holes. Use the pliers to open the loop, tuck it in and secure it. And you're done, ready to show them off with your weekend outfits!
3. Soda Bottle Pencil Case
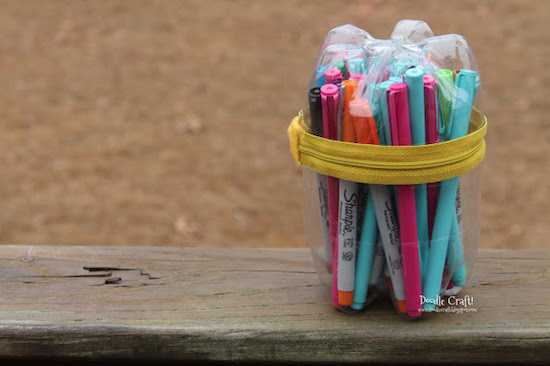
Source: Doodle Craft Blog
If you think the usual pencil case is too ordinary, make a statement this time with a soda bottle pencil case. You can save the earth and looking absolutely cool with it.
Materials you need:
- plastic soda bottles (2 of the same size to make one pencil case)
- scissors and penknife
- coloured zipper
- hot glue gun
- small piece of felt
Steps:
1. First, remove the labels and wash the bottles thoroughly. Clean it and dry them.
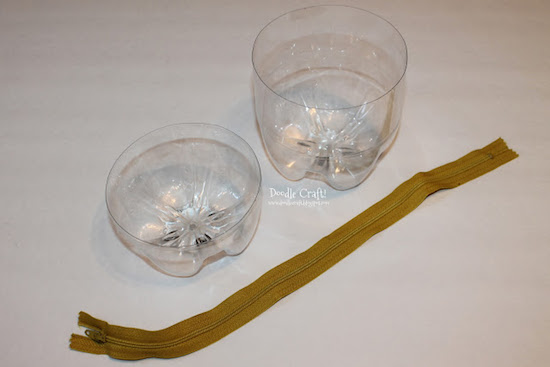
2. Then, cut the bottles to your desired height with penknife and scissors. It is advisable not too cut too much. The height would be easier to adjust once you cut them out. You'll only need the bottom part of the bottles.
3. Once you cut, check the measurement with the stationery you wish to store in them to ensure the height is adequate.
4. Next, measure to make sure the length of the zipper fits the circumference of the bottle.
5. Cut the end of the zipper and replace it by sticking the small piece of felt at the end with hot glue.
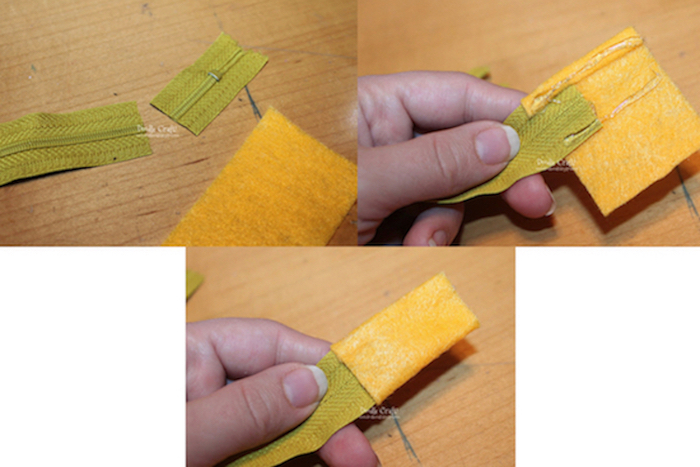
6. Then, glue the zipper around the bottle. To ensure a smooth zip up and down, make sure not to glue too close to the zipper track. Leave the felt edge unglued at the moment.
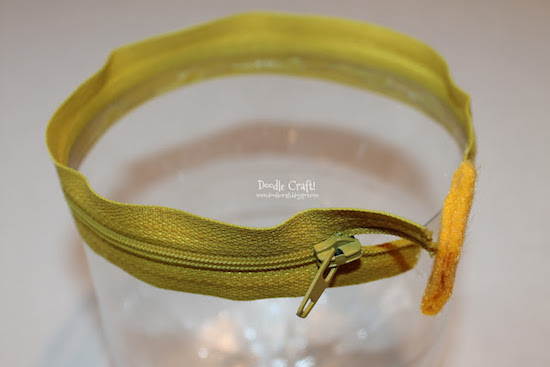
7. Unzip the zipper. Then glue the other half of the bottle along the edge. Once done, zip it up and ensure that the felt fits in place. Complete it by glueing the felt and cover the ends.
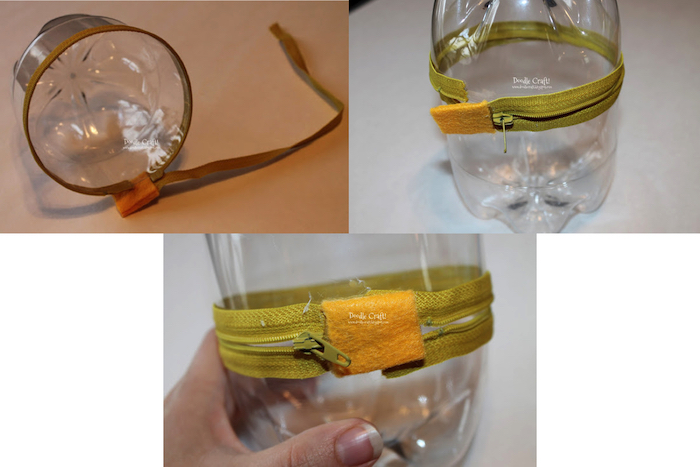
8. The pencil case is ready for storage! Start filling them with your colourful pens and pencils!
4. Plastic Bag Holiday Wreath
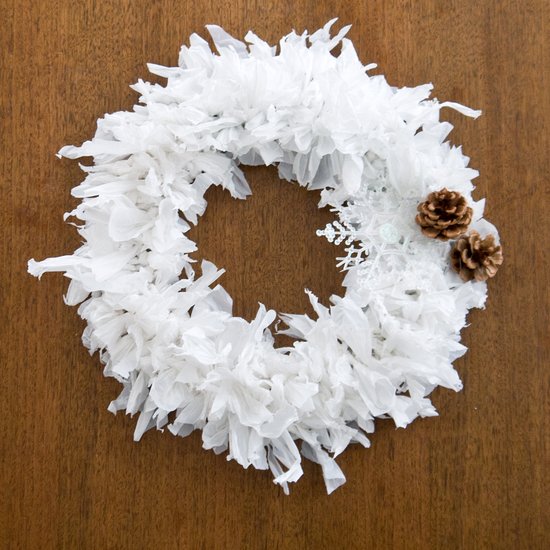
Holiday season is near why not just make full use of a bunch of plastics you have in your kitchen for some holiday decor! This wreath are gonna catch the eyes of your guests. Give it a unique touch to your decor this time with this special plastic wreath.
Materials you need:
- 20 white plastic bags
- scissors
- 12 inch metal frame wreath
Steps:
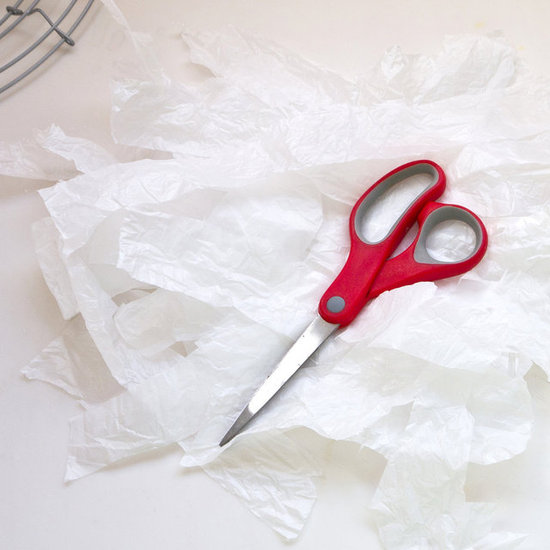
1. Gather your plastic bags and lay them flat. Cut the ends of the plastic bags with scissors. 20 plastic bags is just an estimation, it can be more or less.
2. Cut the plastic bags into long horizontal strips. Each strip about 1.5 inch wide.

3. Then cut away those with words and labels. You would only need the white parts. Then cut the strips to about 3-4 inches long.
4. Get your metal wreath and start tying the plastics around it. Tie a double knot for each strip. And make sure you fill the entire loop. This step may consume time. So find somewhere comfortable which you can work with it.
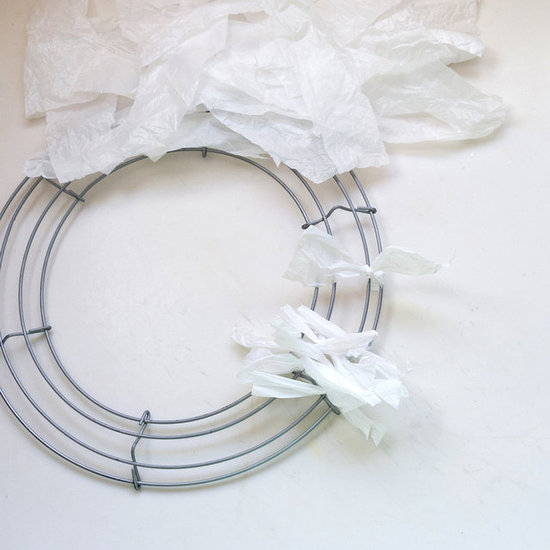
5. Continue knotting. When it is done, cut any excessive sides to ensure the wreath is in good shape. Feel free to adorn the wreath with snowflakes, acorns and other ornaments for a touch of colour.
5. Plastic Bag Yarn Basket
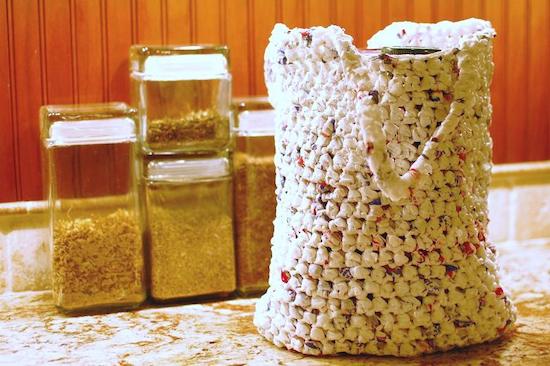
Source: Craftsy
Love knitting? Bring your knitting skill to a whole new level by replacing those yarn with plastic bags instead! You'll call it plarn (plastic yarn). Same method just the end result of it is different. You'll get unique textures and it is water-proof for sure!
Materials you need:
- plastic bags
- scissors
Steps:
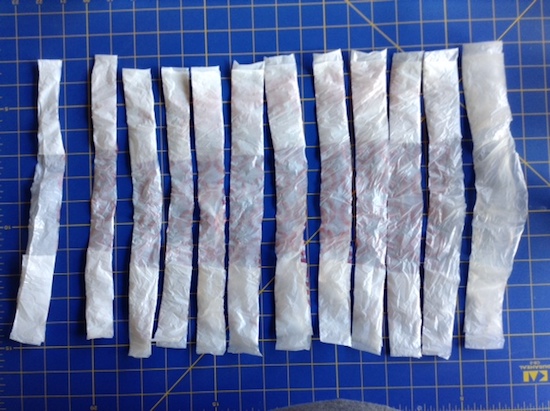
1. Place your plastic bag flat on a flat surface. Lay it as flat as possible. Do not have to mind the wrinkles because you would not be able to notice it once you knit it. Then, cut the handles off.

2. Place the plastic bag in a horizontal manner and cut vertical strips with about one inch width for each. Then, cut the bottom bag off as well.
3. Open two strips of the bag and place the loop on top of one another. Pull the left loop over to the right and from the bottom, pull the right loop over to the left. From there, you will form a knot, pull it gently to ensure the plastic does not go out of shape. So here is where you formed the first knot and the first length of your yarn.
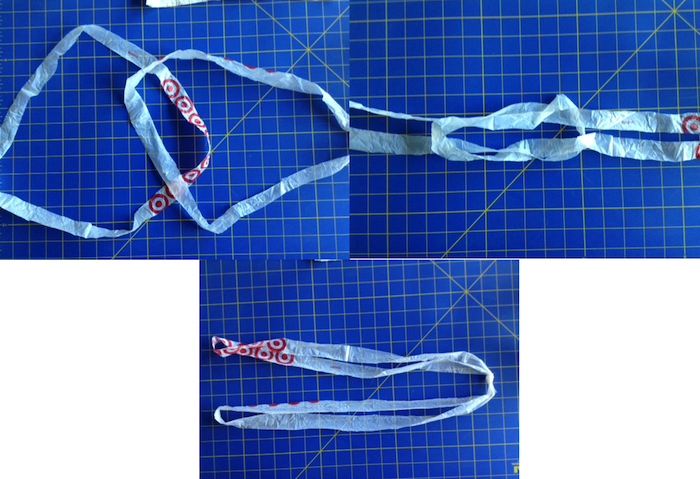
4. Repeat step 3 with the following plastic loops until you have your desired length of yarn to make your basket or project. Do not worry, good thing about this is that you can always add the length of your yarn by cutting more plastic strips.
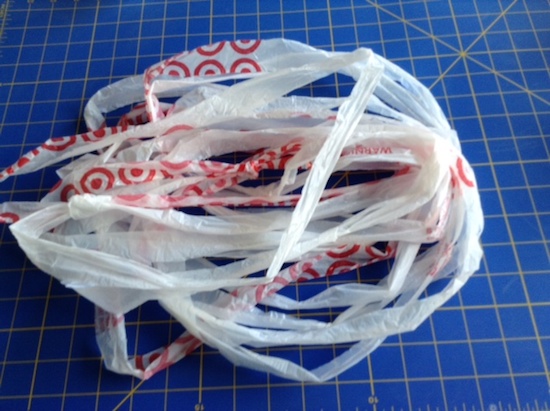
5. Now you can start knitting!
Have fun with plastics by upcycling them into something beautiful! Feel free to share with us your amazing ideas!